Tuesday, December 29, 2009

I Love (kid's) Aprons!

Here are a couple of aprons and matching chef hats I made for the girls for Christmas. I have tried several different pattern for kid's aprons and I found this Michael Miller Fabrics Tutorial at the last minute and decided to give it a try.


I highly recommend this pattern, it was quick and easy and they are just as cute as cupcakes, which I think the hats kind of resemble.

I did this set in Tutti Frutti fabrics and I did a boy's set in a chili pepper print with a flame fabric for the pockets and ties. The D rings on the neck strap give this a "professional" chef look and best of all a package of 4 1" D rings is .78 at Wally's.

Add a couple of Cake or Sugar Cookies Mixes, Frosting and Sprinkles to complete the gift!


Saturday, November 21, 2009

Finally got some inspiration (better late than never?) We are doing the Castle Pines Holiday Boutique show this weekend, it seems to be going pretty well so far. I got a few more bags done today and took them over there. I really love the Moda Peace on Earth fabrics, the colors are gorgeous and they are more winter floral, not actually holiday prints. I made two of those and one of the Gypsy Rose. I think I finally mastered the hobo bag style. Now I want to dig out all the charm packs I have stashed and make some more.

Here are some pictures of our booth. We get plenty of traffic from Di's Pinky Dolls. They are so colorful and the little girls and grandmoms always have to come and look.

I had to move a lot of my quilts into the big suitcase because my runners and candle mats were runnning low.


I have a variety of bags, all one of a kind!
I really can't believe that Thanksgiving is 6 days away! How do the holidays always sneak up like that on me? I need to start making beach bags in the winter and Christmas items in the summer. Just can't seem to get the hang of that idea.


Thursday, October 8, 2009

All Play, No Work

I guess I am back to "business" as usual. I just want to play in my sewing room and keep shoving the new quilt kits to the back burner.

No worries. I shall return to those soon enough. In the meantime I have fall, and holiday gifts and craft shows on my mind.


I found this FREE apron pattern by Susan Branch online and had to try it. I love the retro look and want to do it in some 30's reproduction prints as well as some modern trendy fabrics, I am thinking chocolate and turquoise polka dots and stripes. I tried it first in this fall print, for a special reason. But I am not telling why.

Now a few words about the pattern. It did not work for me really. The pattern calls for 1/4" bias tape. I wanted to line it with a cotton backing and the thickness just wouldn't work so the seams all fell apart when I finished pressing it because it was basically a 1/8" seam. So I started over and used 1/2" bias tape which did work OK but I had to add 1/4" to the seam allowance and topstitched the bias tape down. The real problem is that the pattern is very short waisted and I am pretty short, so I plan to lengthen the top if I can when I try it again.

I made a matching kitchen towel. I love these. I have been using the $2 hand towels from wally's and cut them in half, pleat them then add the topper with ties. It is a great way to use scraps from some of your other projects and you can use purchased 1/2" bias tape for the binding if you don't want to make your own strips for ties. I don't cut the strips on the bias since the topper part is straight, and it works fine and uses up some scraps. This is pretty much $1 gift and everybody can always use a new kitchen towel.

Monday, October 5, 2009

Yummy Cupcakes

I made a big bunch of these cute raggy quilted burp cloths to sell at the craft show but I couldn't figure out the best way to package them for sale. I ended up putting them in a basket with price tags on the back but they didn't do very well.


Yesterday I got to thinking about them and for some reason the idea of turning them into cupcakes came to mind. After a little experimenting it was off to the craft store for some supplies and here is what I came up with.

I used the inexpensive 1 1/2" satin ribbon from Wally's to wrap them, pinned a rainbow rickrack "frosting" around them and stuck a pom pom cherry on top. I taped the paper cupcake liners on with double stick tape. How stinkin' cute is this to put into your baby shower gift basket? I am thinking of getting a cake box to display them at my next show, or maybe I will do a couple of tiered plates from my tea party dishes.


Tuesday, September 29, 2009

Find That Fabric

I am finally in the mood to get back to sewing some new things for fall and winter. I finally found that Alexander Henry fall print that was lost in the batcave. It was, ummm... in a box in a laundry basket that was covered with a pile of towels and who know's how or why it got there. Or why I just finally happened to look under those towels to see what the heck was in that basket... But the important thing is that I can stop obsessing about it and sew again. Here is a little candle mat I made from it. I have a matching runner too. I am getting ready to ship these off to the winner of the GIF (gift it forward) game on ebay seller central. I hope she will love it!

Here is another 6 pocket bag I made a couple weeks ago to match a dress Missy was wearing to a wedding. She couldn't find any pink shoes that were bright enough to go with the outfit so she ended up getting some blinged out flip flops. Ha ha, it turned out she was a little overdressed anyway. The wedding was on a ranch out in Strasburg and was more of a jeans and baseball caps kind of affair. But they said it was a great time.
I wasn't sure whether to add the bow or not, but Krissy said yes to the bow and Missy loved it too. I added a little matching envelope style makeup bag just for fun. You can make one for yourself too, check out the tutorial I have here!


Monday, September 21, 2009

Last Day of Summer

Yup, that is snow on my daisies.
Today was the last day of summer and mother nature decided to play a little joke on us here in Colorado.


Needless to say I was not particularly amused.
The snow was all melted by mid-afternoon, but it is still way too cold for this time of year.

I think it is supposed to be up in the 70s or 80s by the weekend, so should be nice for the craft fair. I have a pile of burp cloths to finish clipping and wash and then some kids tissue pouches and "boo boo buddies" to do too. Then the tagging and packing up to get everything ready to go, that is always more work and time consuming than I expect. It should be fun, I hope!

Thursday, September 10, 2009

Biker Baby

Biker babies are going to love this little girly set I finished up today.

The quilt is a pretty little 4 patch of 2 cotton prints and a minky dot and cotton chenille.

I did my first zipper closed raggy bag today and it turned out really nice. I think I will try the zipper in the hobo raggy bags too.

I have matching fabrics to do this set in baby boy blue too. But I have a bunch of quilt kit orders so will have to get them out before I can work on anything else.

I found the most awesome skull fabric in pink and black with floral print, fell off the fabriholic wagon and had to buy it and now I am dying to make a bag with that.

And I only have 2 weeks to get things ready for the craft fair so I really gotta stop fooling around having fun and get to work.

Sew much fabric, sew little time. sigh.


Friday, September 4, 2009

12 Rag Quilt Projects for the Holiday's

I did not back up my photos. My memory card was full and I deleted most of my craft items so I could save my family photo's. Guess I get to start from scratch now. Although some of them are on photobucket and flick'r, I found out that those saved on Auctiva are not salvageable for copying to other sites.


I wanted to list my 12 Rag Quilt Projects pattern on etsy tonight, but no pics. Anyway, I found it here on Bonanzle. If you are thinking of some quick and easy handmade gifts for the holidays these are perfect. I did the holiday ornaments in Thimbleberries fabrics last year and they were so cute. I am thinking I should get started on some ornaments and holiday items for the craft show soon.


But I am feeling in the mood for a few fall projects and went on a search for that Alexander Henry fabric today. Now I am totally overwhelmed with all the projects I have stashed in boxes and bins everywhere. But I never found that fabric and I am determined to find it. Guess I have the long holiday weekend to continue my search.

I found a box with kits for these adorable Santa and Snowman ornaments from vintage chenille and hobnail bedspreads. Got them listed on my etsy too.

Wednesday, September 2, 2009

Weeks Turn Into Months Sometimes

Hard to believe that I have been gone from here for soooo long. But you know what they say, "if it's not one thing, it's another."


My trip to Gloucester turned out to be 3 weeks away from home. It was absolutely awesome. I love it there and would have stayed on the beach for the rest of the summer, except the kids had this crazy idea that they wanted to go to Colorado.


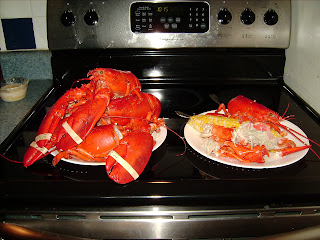
So I packed them off and headed back here for a a few weeks. Goodbye beach and lobster feasts on the deck!
We had fun in Colorado too, except for the unfortunate idea we had to take the kids to Casa Bonita, the worst restaurant on the planet. But that is another story.

Then I drove back to IL to meet up with K to return the kids and a short visit with mom and dad.

When I got home my computer was being held hostage by the nastiest malware program ever invented, so I had to pack it off for a week of rehab. I was also chosen for a pretty cool survey about food products. It was called a blogography. The participants had 2-3 assignments each day for 5 days to blog about. They were not easy assignments, but it was pretty fun and challenging.

Now, back to the batcave for a little more stashbusting. I have been slow to get back to work on my stashbuster challenge, but made a table runner and coaster and towel set and got an apron done (late) for a swap. I have some new tutorials planned for the apron and towels. Really cute, I know you will want to try them! I am going to have to find that A Henry autumn print I stashed last year, I know it is here somewhere.

Di is signed up for a craft show this month and we can only do kid or baby items. She has pinky dolls and tooth fairy pillows, I am going to get started on a few burp cloth sets and diaper bags for that.
Pics and projects tomorrow I hope!

Sunday, July 5, 2009

Bag Lovers Unite!

My Envelope Style Makeup Bag tutorial got listed on this awesome site DIY Bag Lover.

If you love to make all kinds of bags you should hop over there and check it out.

If you have a great tutorial that you would like recommend post a comment to get it listed there!

I think my charm square rag quilt purse tutorial is pretty good, so if you haven't checked that one out you should!

I am leaving on vacation tomorrow and won't be doing any sewing for a couple of weeks, boo hoo! But I plan on checking out a lot of these tutorials as soon as I get back to my batcave.

My Old Fashioned Hat Pincushion tutorial also got listed on Craftzilla's Glue Gun Crafts Around the Web Roundup. She has tons of cute projects and her site is so nice, go check them out too!

Will be posting on the road for the next couple weeks. I'll try to post some pics along the way and share some more links for great crafting sites. I will be looking for apron patterns, since I am in an apron swap now. We don't have swap buddies assigned yet, but I am excited about making something special for my buddy. We are posting our favorite things and colors and I can't wait to find out who I am making it for.

Saturday, July 4, 2009

Today's Special: Stashbuster Challenge # 7

Here is a Black and White Delite Bucket Bag I finished today. This one was inspired by the darling pincushion that I got from Stephanie in our RQQ pincushion swap. In fact one of the fabrics in the pockets is from a great Benartex FQ that Stephanie used for gift wrapping my cushie.

I used D rings for the strap and it was pretty perilous getting through 8 layers of canvas, 2 layers of cotton and a layer of batting when I stitched the straps onto the ring! I was sure I was going to end up with a bent needle at least.

Luckily my beastie Pfaff was up to the challenge and hardly even groaned, even when I backstitched. I love that machine!

I have another beach bag started for my next project. I bought the fabric to make a bag a few years ago after I made my first purse that I gave to Missy for Christmas. I am beginning to think that if I just keep digging I will have enough projects to keep me busy until I retire, but that is a sad thought. I can't possibly go too much longer without buying something new, can I? And also, how can I retire when I don't even have a job!??

Thursday, July 2, 2009

Another Hobo Raggy Bag.
This one is done with Moda Gypsy Rose charm pack and a vintage chenille cutter bedspread that I have had hanging around.
I put a chenille pocket on the outside of the bag too for slipping a cell phone into.
I used all coral and brown brown colorway squares from the charm pack and saved the ones with lavender in them. I was sorely tempted to stop by Sew-Ciety on my way to Wally's the other day and buy a yard of something in the lavender colorway to make another one.
But I was a good girl and kept to my challenge and chose not to enter a fabrics store.
Lead us not into temptation.
I am calling this my fabric diet, wish I could do as well on a real diet!
I have another project going now with the B&W and red.

Wednesday, July 1, 2009

Stashbuster Challenge: 2 more projects done!

I am holding up to my challenge and managing to complete at least one new stashbuster project a day!

Here is a new beach bag/tote that I made from some scraps I found when I was scavenging through a box for something. Actually, I have no idea what I was looking for at the time, but I managed to use up every scrap of the fabric and I love the beach bag.


I have had this idea for a new hobo style drawstring purse and found some vintage chenille squares I had stashed from a swap last year so I added a few of them in too.

I really like this new pattern I made up. It went together so well and has a completely new look. The fabrics I used are from one of my quilt kits. I sold a few raggy purses made from these shabby rose fabrics last year, so I think this one will be pretty popular.


Now I am hooked on this pattern. I made another in the Moda Gypsy Rose prints today but ran into some difficulties with the grommet for the drawstring. I will get that fixed tomorrow.

I have my next project ready to go too. I will have to surprise you with that one, as I have been changing my mind on which pattern I am going to use.

This is kind of fun, just going shopping through my stash fabrics could keep me busy for quite a while. Maybe I will change my challenge to 20, or 30!

Saturday, June 20, 2009

Americana Slouch Bag Raggy Style


I tried this pattern in a couple of different fabrics a few weeks ago, then I hit on the idea of trying it raggy.

It went together pretty nicely and I think it is fun.

It is really, really long! 36" tall from the top of the strap to the bottom of the bag.


I am going to have to issue an organizing challenge to get my studio straightened out before I am allowed do any more fun projects. It is out of control I say!
I will post "before" pics later today. Then get to work on it.
Challenge # 2: Make at least 10 items from my stash before I am allowed to buy anything new!

Thursday, June 18, 2009

I have to show you this pincushion


Here is my very special, gorgeous personalized pincushion that I got from Stephanie in the RQQ pincushion swap I organized.

I just love it! The decorative stitching and the button are awesome, and it has my name on it in SILVER! How cool is that? I am going to have to check out those Benartex B&W fabrics, love them with the red.

Drink Pink Happy Hour Wristlet Bag


My newest creation was not really planned and didn't go very well for me. I am calling it the "Drink Pink" happy hour bag set.

I just decided to fool around with the makeup bag pattern that I made up for K and did it in this cool decorator print I picked up at Denver Fabric's a while back. I put a magnetic snap in the envelope flap on the bag, that worked out pretty well and I like it better than the velcro. I really hate velcro! But then it took me a while to figure out the cellphone pouch and I decided to make a little credit card wallet to match. Big problems with that, I kept doing everything wrong and had to rip it up a few times to get it right. That pattern is definitely going back to the drawing board! But overall I think the set is cute and may list it tomorrow if I have time.


Here is the Boho Blossom set I sent for Irene. I did a matching cellphone pouch and a little ribbon embellished bag for "personal" items to match. Hope she loves it.

Tuesday, June 16, 2009

Envelope Style Makeup Bag Tutorial: Boho Blossom

Quick and easy make-up bag for K with tutorial.

Finished one flip flop beach bag today. Only 19 to go!
K emailed me today and wanted a quick pattern for a make-up bag she can make in one evening.
I found quite a few tutorials and freebies online, but they all had zippers. I thought I would try to come up with one that doesn't have a zipper, since I doubt she has one on hand.
My first one was cute, but way too small. Will have to try it again later.
This one came out very cute and didn't take too long. Here is a quick tutorial. I didn't take many pics but it was pretty easy and I will try to give good instructions.
For this make-up bag you will need 2 FQ's: one outside fabric and 1 lining
Paper to draw your pattern
Stiff fusible interfacing or fusible fleece
Small piece of velcro
One button
Ruler
I happened to have a template for the envelope top of the bag, but you can draw this, it should be 10" wide at the bottom.

Draw another pattern for the bag body. It will measure 10" across at the top and taper out 1" on each side to make 12" across the bottom.

Cut two of the bag body from each fabric. Cut one of the envelope top from each fabric. Cut 2 of the bag body pieces from the interfacing or fleece and one of the envelope top. Trim these to approx. 1/2" smaller all the way around. Fuse the interfacing to the outside bag pieces.
With right sides together stitch around the curved edge of the envelope top, leave bottom open. Clip curves, turn and press. Topstitch around the finished edge.
Press under 1/2" along top edge of the bag body. Open pressed edge and stitch sides and bottom edge taking a 1/2" seam. Press seams open and turn under the pressed edge.

Open the corner out to form a triangle, make sure that side and bottom seams are lined up. Use a pencil or marker to mark a 2" line across the triangle one each side of bag.
Stitch on line and trim excess triangle away.
Turn and press well.


Make the lining the same way as you did the outside bag. Do not turn. Place the lining inside the bag and line up side seams to match.

I love these fabrics! The outside is Michael Miller Boho Blossom in Orchid and I got the FQ of Michael Miller Fairy Frost from a RQQ swap.
Insert the unfinished edge of the envelope top into the back top edge of bag between the layers. Pin securely. Stitch very close to edge (about 1/8") all the way around.


Position a 1" piece of velcro to match and stitch or glue it in place. I use a heavy duty fabric glue because I am not fond of stitching velcro, but stitching it would be good too.

If you want you can stitch a decorative button on the front, just to add to the cuteness.

I have a ton of ideas for embellishing these little bags with ribbon or rick rack and maybe adding a little hanging loop and bow to the side too. I didn't want to waste any of the Fairy Frost FQ so I made another little bag with ribbon trim and a velcro closed top, I even sewed the velcro in. And I had one 4 1/2" strip left so I made a little cell phone pouch too.

enjoy!


Wednesday, June 10, 2009

The Stylish Hat Pincushion: a Tutorial

I hosted a pincushion swap and found so many cute pincushions online and quite a few nice tutorials. I didn't see anything like this one so I thought I would share mine with you.


This was the original, it was Mr. Rainbow Creek's Grandma Bs' pincushion. I adopted it after she passed away and I found it in her sewing box.

Here is one that I made, it doesn't have quite the same character as the original but it turned out pretty cute, and I added a few of my own embellishments.


To make this pincushion you will need: Craft glue and/or hot glue gun. 1 tuna can, 1 fat quarter of fabric, 1 8"X8" square fusible fleece, polyfill stuffing, 8"X8" muslin square, 1 piece of corrugated cardboard at least 8"X8". Optional embellishments: coordinating baby rick rack, 4"X24" strip of tulle, 3/4" wide ribbon for hat band, 1/4" wide ribbon for hanging loop, ribbon roses.
Trace an 8" diameter circle onto cardboard, score along the marked circle with rotary cutter or utility knife and then cut out circle with scissors.


Cut a 10"X10" square from the fabric.


Now you will want to cut the fabric square into an approx 10" circle. Fold the square into a triangle and then fold in half several times to make a cone shape.


Cut off the top triangle part of the cone and open the fabric up. Voila! You should have a 10" circle.


Using this same method make 1 8" circle for the hat top and one 8" circle from the muslin square.

Don't worry if you missed and somehow end up with a flat side like I did, it will work out fine.

Now you will want to make a big Yo Yo from the circle.

If you happen to have a sewing machine handy you can make this a lot easier by quickly running a gathering stitch around the outside edge of the circle using a long stitch length.


If you want to do it by hand run a basting stitch all the way around and leave the ends long enough to pull to gather.

Insert the cardboard circle into the yo-yo and gently pull the threads to tightly cover the cardboard. Put a bead of glue along the edge of fabric and press it tightly to hold.

Take a big handful of polyfill stuffing and make a tight ball. Wrap the ball of fiberfill with the muslin circle.

Use craft glue or hot glue gun to secure the ball of stuffing in tuna can, keeping the top as smooth as possible.


If you are using rick rack embellishment glue it to the outside edge of the hat brim.


Cut a circle of fusible fleece to fit the 8" circle and fuse it to wrong side of fabric.
Gather the circle by hand or machine basting stitch.
Cover the tuna can with the circle and pull it as tight as possible without breaking your thread. Work the gathers around the can so they lay evenly. Glue into place on bottom of can.

Glue the hat top to the cardboard circle with hot glue gun or craft glue. Push down hard to make a good tight seam.

Embellish with tulle and ribbon hat band.
Take a gathering stitch through center of the tulle strip and pull it tight around the bottom edge of the hat, tie a knot to hold in place.
Glue ribbon hat band in place, leaving enough loose ribbon on each end to tie a knot and leave a streamer. Glue ribbon roses in place.


Make a hanging loop from the 1/4 inch wide ribbon and glue into place on bottom of hat.


I tied a ribbon to a pair of thread snipper scissors and glued a piece of velcro to the hat and the bow to attach the scissors.


Here is my adorable Summer Strawberry hat pincushion. Cute enough to hang on the wall of your sewing room or use everyday to hold you pins and needles close by!


Are you going to try making this pincushion? Please comment and leave me a link for your pics if you do! I would love to see how yours turns out and how you choose to embellish it!
And of course, if you have any questions feel free to ask.

enjoy!
 
Template: Blog Designs by Sheila